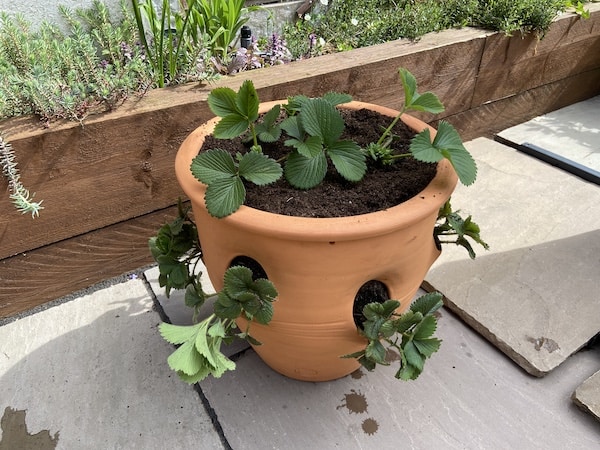
If like me, you love strawberries then you can’t go wrong growing them in planters/pots and they look amazing as they trail down, especially if you use a strawberry planter with holes in the side as I did.
They’re super easy to grow, they literally look after themselves with the exception of giving them some water and a little feed which I talk about further down and they taste amazing straight from the plant.
I had previously grown strawberries in my raised beds where I installed an automatic watering system which I documented here, this really helped make it low maintenance but the trouble was they spread like wildfire so I decided to grow them in pots and plant the raised beds in herbaceous perennials this year.
This brings me to this guide on how to plant a strawberry planter which I thought will be useful for anyone who is thinking of doing the same but not quite sure how best to do it, what compost to use etc.
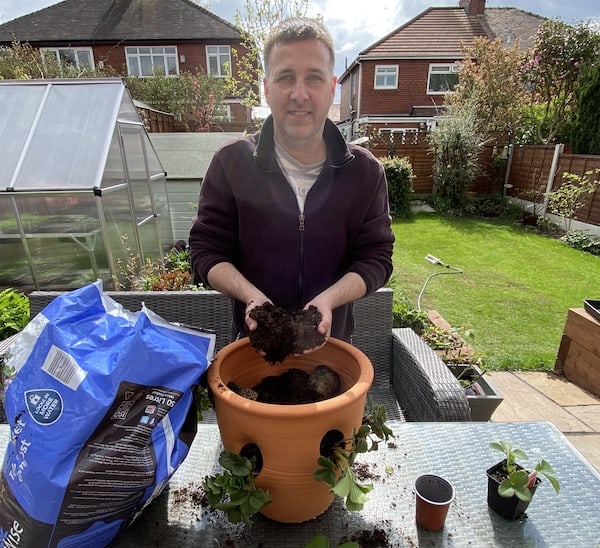
First things first, I have used a terracotta strawberry pot as I like the way the strawberry plants trail down the sides plus I get to use more plants and get more fruit. You can actually use any type of pot or even plant them in troughs and hanging baskets. Anyway, let me get straight into how to your very own strawberry plants in pots.
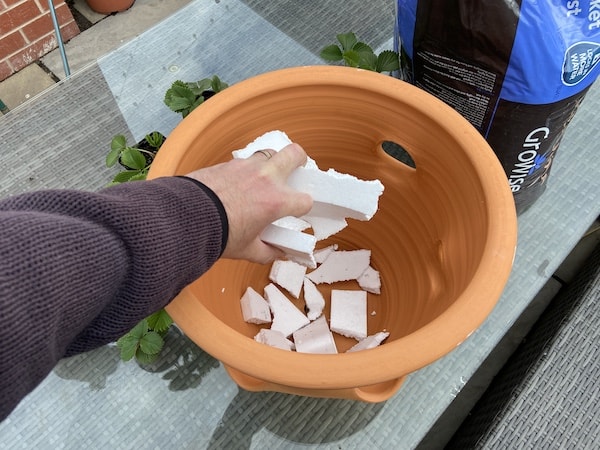
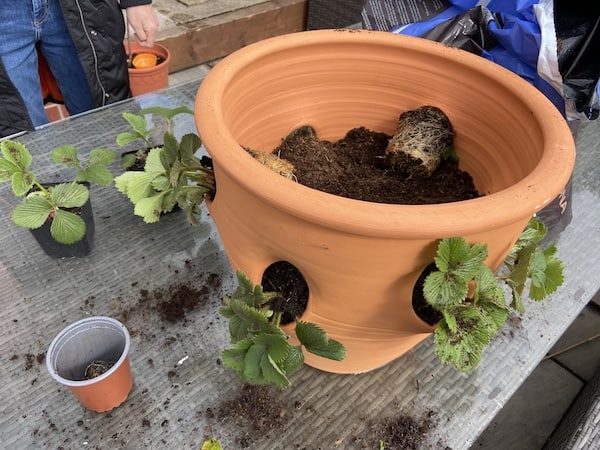
Step 1 – Adding crockery to prevent the hole getting blocked
Once you have your chosen planter, the first thing you need to do is make sure it has holes in the bottom so that the water can drain away freely. Some plastic pots don’t have holes so these can be easily drilled using a large drill bit.
Once you have your pot, the fun starts. Add some crockery (broken pot) to the bottom of the pot to help prevent the holes from getting clogged up. I actually used pieces of polystyrene as it is lightweight and works well. You could also put a layer of stone in the bottom.
Step 2 – Choosing the right compost and adding compost to the pot
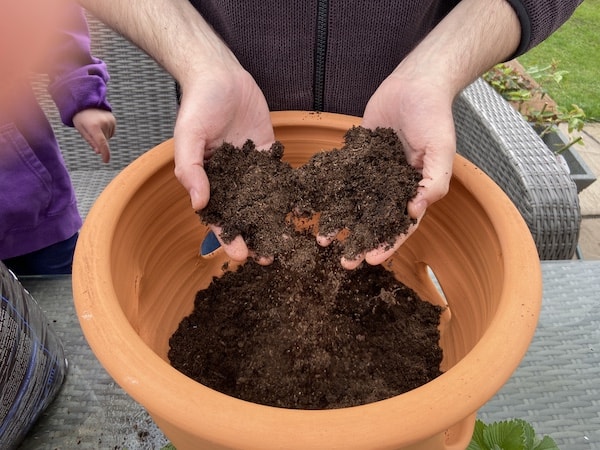
Next, add a layer of compost to the bottom of the pot so that it reaches the bottom of the holes in the side of the pot as shown above. I like to use a tub and basket compost as it usually contains water retaining granules and added fertiliser but you can also use multi-purpose compost or some good quality potting compost. If you have a normal pot, simply fill the pot with compost to within an inch of the rim of the pot and skip to step 5 below.
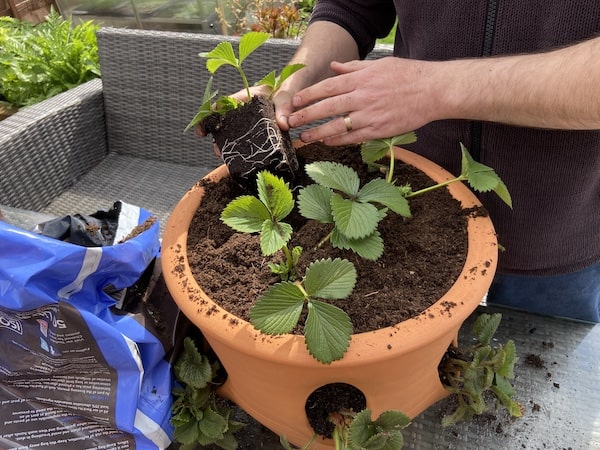
Step 3 – Planting the strawberry plants
Next, insert the strawberry plants from the inside of the pot, carefully feeding the leaves through the holes being careful not to damage the roots or foliage. Don’t worry too much, strawberries plants are super hardy and are difficult to damage.
Now top the pot up with more compost to the next set of holes and add the next strawberry plants. Continue this process until you have planted a strawberry plant in each hole. Make sure you firm the soil inside the pot but be careful not to make it too compact.
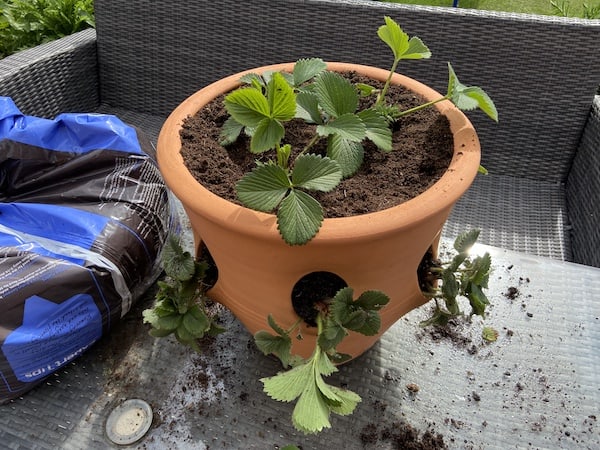
Step 4 – The final stages
Finally, fill the pot with compost to within an inch of the rim of the pot and then plant the final strawberry plants on the top of the planter. For most strawberry pots, 3 plants are usually plenty.
General care
Strawberry plants usually take care of themselves. Position them in an area where they will get plenty of sunshine. This will help the fruit swell and turn red. Keep an eye on the watering as they are thirsty plants and usually dry out quickly in pots. This is especially true with terracotta pots as they absorb the water.
I like to allow the surface of the compost to become dry between watering but don’t allow the compost to totally dry out. You could also consider using an automatic watering system designed for pots like I have set up. To fully automate the watering I also use a water timer, again I have also reviewed my water timer here.
You can feed them with a liquid fertiliser every couple of weeks once they start to flower and while the fruit is growing, this will depend on the variety you choose as some flower and fruit early with other varieties fruit later. I usually just use a high potash feed such as tomato fertiliser which is cheap and contains everything they need to produce the best crop.
You can learn more about what to do with strawberries after fruiting here as well as how to protect strawberries them from pests here