The thing with hose pipes is they can get in the way, one way around this is by installing a wall-mounted hose reel as I did. I choose to install the Gardena Automatic Hose Reel which is a well-built piece of kit. Personally, I think it’s the best auto hose currently available and it put most models to shame in terms of quality and reliability, it even comes with a 5-year warranty.

This article is a step by step guide on how to install a hose reel on the side of a house or any wall for that matter. If you are interested in which are the best automatic hose reels then you can also check my review here. If not, read on to learn how to install the wall mounted hose reel.
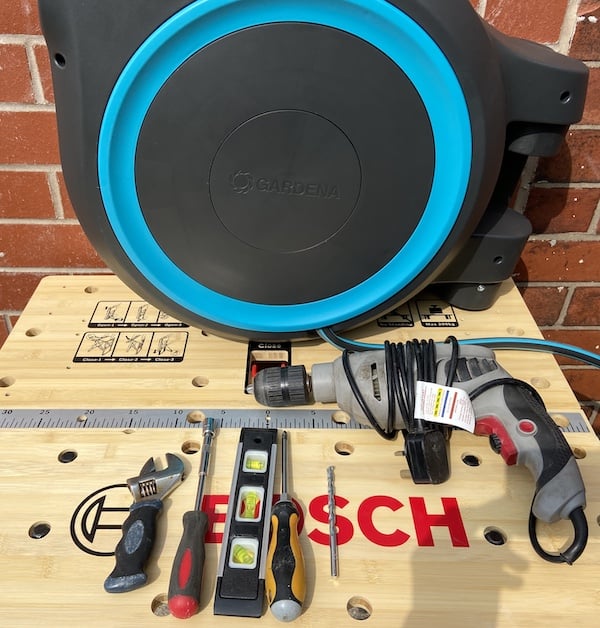
What you will need
- Your wall mounted hose reel of choice with fixtures – Mine was the Gardena Automatic hose reel but Hozelock do a similar one too.
- SDS Drill or standard Hammer Drill
- Spirt level
- Plus Screwdriver
- Spanner or small socket
- Masonry drill bit
- Marker pen or pencil

How to install the hose reel onto a wall
Step 1
So the first thing to do is check you have everything you need and double-check all the correct fixtures were included with the hose reel and nothing is missing. Depending on the model you have, you may need to separate the main hose reel from the hanging bracket. On most models, there is a small screw to undo and then the hanging bracket should just lift off the main hose reel as shown in the picture below.

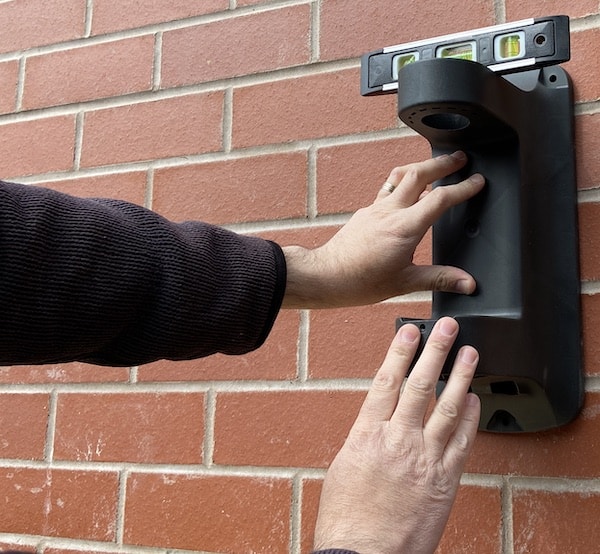
Step 2
Next place the wall bracket against the wall where you want to mount the hose reel, now make sure it’s level by using a spirit level and hold in place being careful not to move it.
Step 3
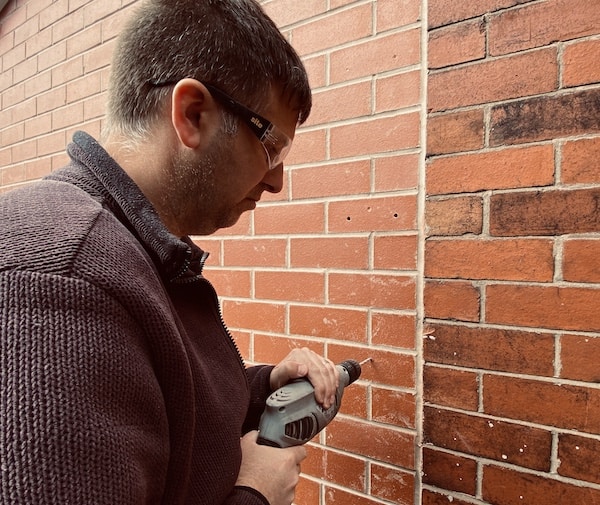
Now mark where the screws will screw into the wall with a marker pen or pencil. On some models, the holes may be too small for a marker to fit through so it will be easier with a pencil which is what I had to do.

Step 4
Now get a suitable drill masonry drill bit, the instructions will tell you what size you need depending on the size of the screws and plugs that were included. I needed to use an 8mm drill bit which I had in my Bosch drill bit set which was also the winner of my best pick in my drill bit set review recently.
If you don’t have the right drill bit then you will need to buy the correct size online or from your local DIY store such as B&Q. Don’t be tempted to use a drill bit that is larger or small than recommended as it never ends well. I also recommend drilling into the brickwork and not between the bricks as the mortar can come loose and the hose reel can fall off the wall especially with something as heavy as a hose reel.
Now carefully drill the holes using the correct drill bit where you marked on the wall earlier, start slow until you make a small hole and then speed up. This will make it easier to drill the hole and help stop it from sliding over the brick as you drill.
Step 5
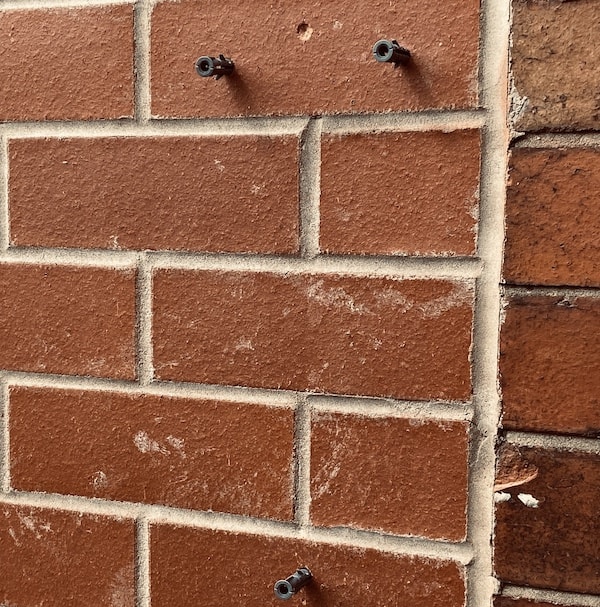
With all the holes drilled, which in my case was 3, 2 at the top and 1 at the bottom, now push the included plugs into the hole as far as they will go and then hammer them in fully using and hammer.

Step 6
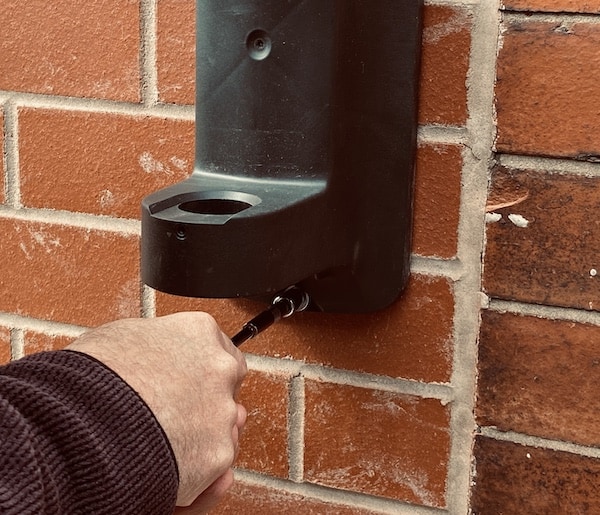
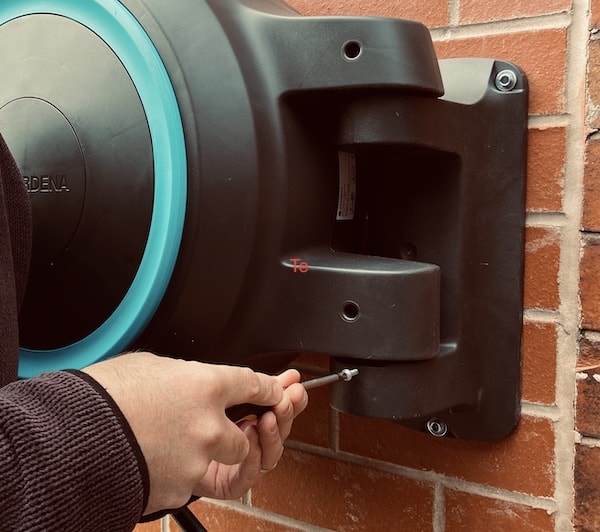
Now you’re ready to fix the bracket to the wall, place the bracket in line with the holes you drilled and now use the fixtures which were included in the set to fix it to the wall securely.
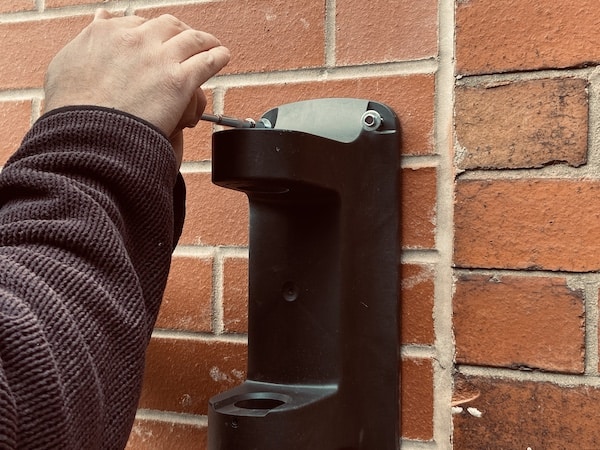
My screws were really heavy-duty being a quality Gardena product and had hex ends so I had to use a small socket but you can use a small adjustable spanner. Again, my Bosch drill bit set come to the rescue as it came with the correct socket size for the job.


Are you starting to see why I named it my Best Pick. Some wall-mounted hose pipes will just include long screws with a normal Philips end so you can just use a normal screwdriver. You can also use a cordless screwdriver or impact driver which will be easier but I used good old manual tools to give me a bit of a workout.
Step 7
Almost finished now, simply slide the hose reel onto the bracket you have just fixed to the wall.
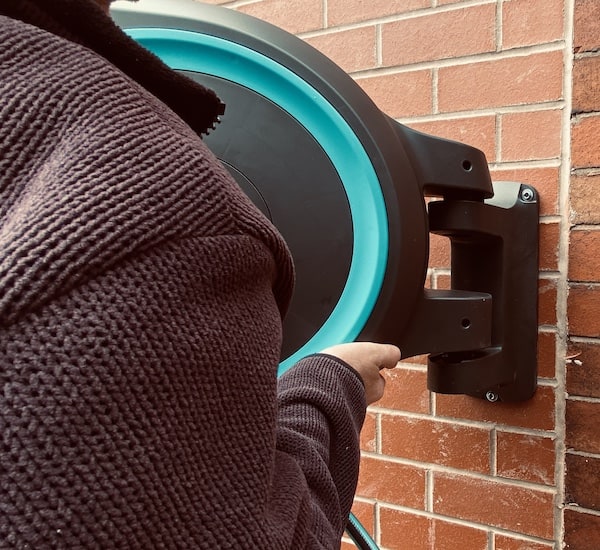
Step 8
If you had to remove a small screw to separate the main hose reel from the bracket before you started, you will need to screw that back into place. This will also help stop people stealing it.
Finally, attach the feeder hose to your outside water tap.

Thats it, it now ready to use and out the way against the wall when not in use.

Last update on 2026-06-21 / Affiliate links / Images from Amazon Product Advertising API