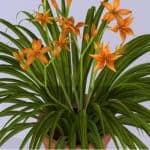
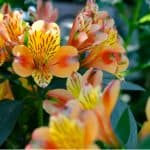
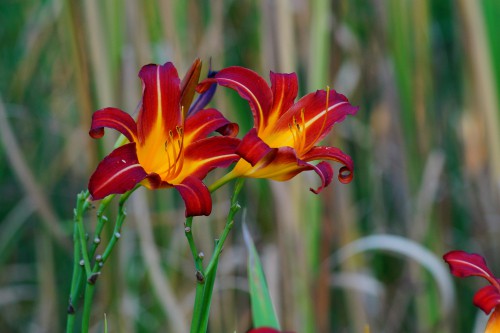
Daylilies are among some of the most popular perennials for any garden. They are very versatile, easy to grow, and they produce flowers that, as the name suggests, bloom for just one day. However, they are significantly floriferous so you don’t have to worry about only enjoying a single flower once. Healthy plants will give you a multitude of flowers throughout the growing season.
For UK gardeners the Daylily is particularly enticing because of its versatility and its ability to handle just about any fluctuation in temperature or growing conditions.
That being said, if you already have a successfully growing Daylily, you are no doubt aware that you can divide and transplant older plants so that you have a collection of Daylilies throughout your garden without overcrowding any single plant. However, you can also propagate and grow your Hemerocallis from seed if you don’t want to disturb a successfully growing plant. It does take longer before you will see flowers, but if you sow them early enough you can see flowers within the first year, however, it can take up to 3 years so be patient.
Why use seed propagation?
The main reason you want to consider propagating from seed is for hybridisation. You will be surprised how easily Daylilies cross-pollinate and if you have more than one variety in your garden this is a great way to create interesting hybrids all on your own. If you grow hybrids from seed you will absolutely produce some unique Daylilies because each seed usually produces a different flower. These can then be divided a few years later to get the same flowers.
How to cross pollinate plants
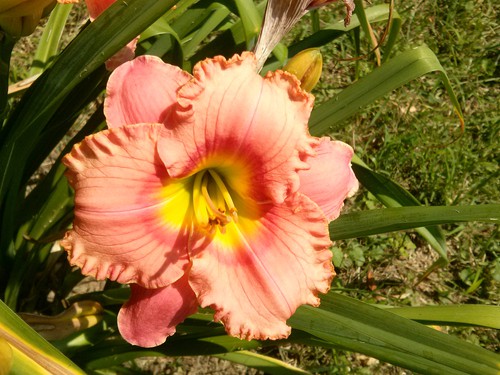
In order to successfully cross-pollinate you simply pick the two parent plants with the traits that you want to be combined, and then using a painter’s brush or a cotton swab, brush the pollen of the stamen from one plant’s flowers and deposit it directly onto the pistil of the other plant.
Make sure you mark the flowers that have the deposited pollen so you don’t pick them by accident and put them in your vase if you usually use them for cut flowers. Also, be sure to avoid deadheading because you want that flower to fade naturally.
There is a 50% chance that when it fades it will develop into a seed pod. You might have to try this process multiple times with the two-parent plants in question before you successfully get the seed pod.
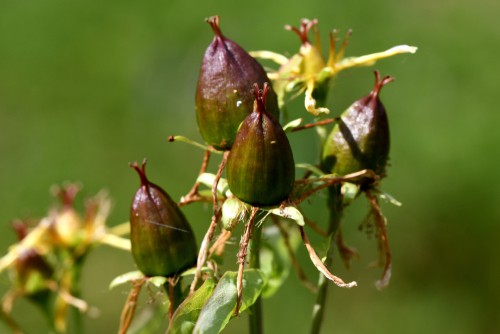
How and when to collect seed
Once you have it, let it dry out naturally on the stem. The flower and subsequent seed pod should turn brown and start to split open. Once this happens, pick it and leave it stored in a warm, dry place until you are ready to plant. Some gardeners also choose to store them in a cool refrigerator until they plant them. You can, of course, plant the seeds immediately if you are ready.
The earlier you plant the seeds the sooner they usually flower, if you can get the seeds to germinate by the end of July/early August, you may get flowers the following summer if you’re lucky.
How to plant the seed
Planting directly in the garden
When you are ready, you can sow the seeds directly in the ground in most climates. Using moist soil with a lot of organic matter mixed in you can place them approximately 1.5 to 2cm deep. Keep the soil moist until you see the seedlings which should take place within around 14 days.
Planting indoors
Alternatively, you can start the seeds indoors if you don’t want to try outside when the weather might not be on your side. We recommend using small pots and planting 3-4 seeds from the same flower in each pot. Plant them around 2 inches deep and leave them on a warm windowsill keeping the soil moist but not wet because this can cause them to rot. You can keep them indoors until any chance of frost is over (in the spring) and then transplant them outside.
Bear in mind when sowing your Hemerocallis seeds that can take between two and three years for the Daylilies to produce new flowers. However, once they do you’ll have something unique and completely yours.
Other articles you may be interested in
Growing and caring for Daylilies
Why is my Daylily not flowering?
The best propagators for starting seeds