Last updated on May 6th, 2022
Our site is reader supported, this means we may earn a small commission from Amazon and other affiliates when you buy through links on our site.
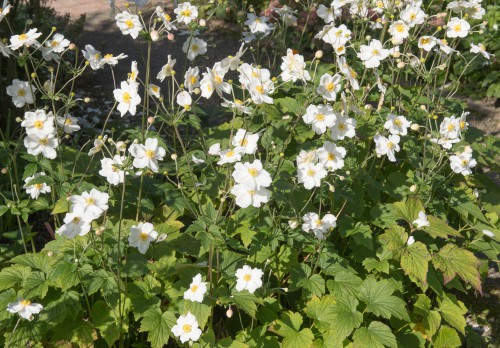
Japanese Anemones flowers are beautiful, often sitting happily above their green foliage. Producing flowers that are often white or pink, they are probably one of the most popular perennials to grow and it’s not hard to see why.
They will flower from the summer, right through to the beginning of autumn. If you have successfully grown these plants in your garden, you can divide them periodically just as the new growth is emerging to prevent them from becoming overcrowded.
You don’t need to divide them as frequently as some other perennials but if you don’t divide them regularly, and by regularly we mean every 5 to 10 years, they can get a little crowded and they might overtake nearby plants or not flower as well as they once did.
If you want more information on how to grow Japanese Anemones you can read our article here
When should you divide your Japanese Anemones?
If you have Japanese Anemones, while it is important that you divide them, they don’t tolerate frequent disturbances so this is a process you should only do every 5 to 10 years.
Do not divide them during the autumn as you would with other plants. Usually, if you try to divide them late in the season they will very rarely survive and that’s simply not a risk you want to take. Instead, this is something you should do in the spring, just as they start to show signs of life. As is the case with almost all plants, it’s better to divide when they are not actively growing.

How to divide a Japanese Anemone
Step 1 – loosen the soil around the roots
Start by inserting your garden forks into the soil, about 15-30cm (6-12 inches) away from the base of your plant. You want to pull back on the handle to try and loosen the soil and work your way around the base of the plant. Continue at this distance until you have loosened the soil enough that you can remove the entire clump of the plant without damaging the roots too severely.
Step 2 – Shake and rinse the roots
Once you have lifted the plant, you want to shake and rinse clean the roots so that you can see them easily. The roots of Anemones tend to be very thick and almost tuberous. They are covered by thinner, fibrous roots and the better visibility you have, the easier it will be to divide them without damaging them.
Step 3 – Divide the main clump into several sections
Look for the centre of the clump as you tease the roots apart with your fingers. Once you get to the clump you want to divide it into two or three separate sections. It’s important that these divisions are very similar in size so and as you work your way from the centre, try and maintain that similarity. You may have to cut through the thinner roots that hold the thicker roots in place in order to completely separate your divisions.
Step 4 – Add compost to the soil and plant the divisions to the same depth the original plant was planted.
After you have completed your divisions, add a few centimetres of good quality compost to your planting bed or your garden and mix it in with the soil to improve the nutrient content and moisture retention. Homemade compost will be fine if you have a compost bin. Take your divided clumps and place them in well-drained soil and a location where it will receive at least six hours of sunlight every day.
Note: When you plant the new divisions, they should be planted at the same depth as they were in their previous location. The roots should be spread out slightly when you put them in the hole.
If you are planting more than one division in your garden make sure that they are spaced at least 1-2ft apart in all directions to give them plenty of space to grow, this will ensure they don’t need to be divided again too soon.
After you have planted your divisions, water them until the soil is sufficiently moist. Immediately thereafter, be sure to water them at least once a week until the divisions get established because this is when they are most likely to dry out.


