How to grow Hydrangeas
Hydrangeas are one of the most popular plants and for good reason. They are very easy to care for and can be grown in almost any climate. With this in mind, it is important that you understand how to choose the right Hydrangea for your garden, how to plant them, tend to them and all other areas of care. This guide will give you everything you need to get started.
Recommended Varieties
The first thing you need to consider is which Hydrangea you are going to choose. Take into consideration the amount of space that you have and what you want your plant to do for you. Do you want it to create a hedge? Do you want it to provide beautiful flowers? What colour do you want for the flowers? How large do you want the blossoms to be? And, are you ready to care for a larger plant versus a smaller plant?
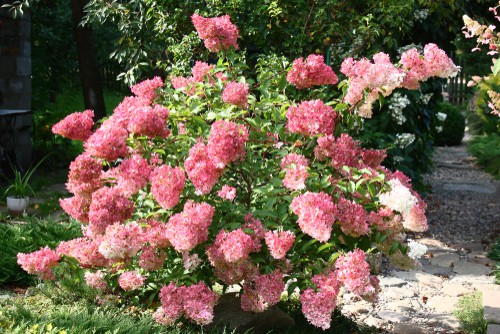
All varieties of Hydrangea will grow well if they get morning sunlight and afternoon shade but you should still choose carefully the variety you prefer. The most popular Hydrangeas are the large mop head varieties that come in a range of colours and the best thing about these Hydrangeas is that you can control the flower colour from pink to blue by changing the soil from alkaline to more acidic.
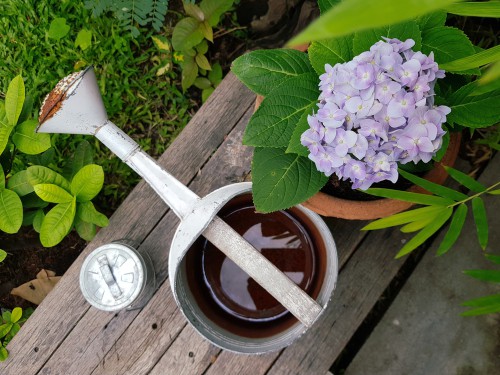
If you want to grow your Hydrangea in a pot see our guide to growing Hydrangeas in pots.
Planting Hydrangeas
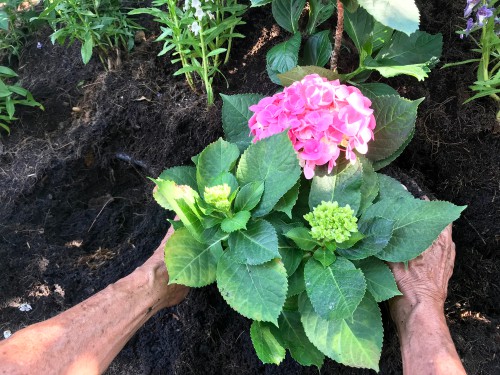
After you have chosen the type that you prefer it’s time to plant. But you need to do so in such a fashion that your plant remains healthy and is able to thrive in the area you choose. Pick a location where your Hydrangea is able to reach a reasonable size without initial pruning. When you plant the Hydrangea make sure the soil is well-drained but moist. Never plant it too deep into the ground or it won’t really be able to thrive. A good rule of thumb is to plant your Hydrangea to the same depth it was in the pot or container it was supplied in.
If you plan on planting one in a pot and it is one of the mophead or panicle Hydrangeas then make sure you get the correct compost. If you have a blue flowering variety, use ericaceous compost and if it’s pink, use normal potting compost.
The best time to plant Hydrangeas in terms of the season is at the beginning of summer or autumn. If you are transplanting a Hydrangea, you want to do it when the plant is dormant and after it is lost all of its leaves at the end of autumn or the beginning of winter. Pot grown Hydrangeas can be planted at any time of year but they will need watering frequently, especially in summer.
You can learn more about moving and transplanting Hydrangeas in this guide here.
How to care for Hydrangeas
Watering your Hydrangeas
Hydrangeas require moist but well-drained soil in order to thrive. There is no specific rule per se for watering Hydrangeas, you just want to make sure that the soil remains moist but not too wet. To that end, every variety requires a slightly different level of water and where you plant it will also determine how much water is required to maintain an effective moisture level. Typically speaking, you can tell when your Hydrangea needs more water based on looking at its foliage and flowers. When your plants require more water the leaves will start to wilt, however, ideally, you want to water it before this point because the leaves can be damaged if they wilt for too long. If you have the Hydrangea paniculata it will need more water compared to a smooth Hydrangea or an oak leaf Hydrangea.
Fertilising Hydrangeas
There are specially formulated fertilisers for Hydrangeas, however, most of the time they aren’t necessary. All-purpose fertiliser is the easiest for Hydrangeas and can be applied at the beginning of spring or summer. Do not apply it in the autumn when your Hydrangea is preparing for dormancy because it will accidentally trigger new growth that your plant is not ready to sustain. Equally important is to know that the fertiliser is there to give you plant food, but that doesn’t necessarily mean it will automatically help your plant to flower. If you are having issues with the plant flowering it is probably indicative of a mistake made during pruning.
If you have blue mophead Hydrangeas then it may be better to feed with an ericaceous feed that is designed for acid-loving plants because it will help them retain the blue flower colour.
How to prune Hydrangeas
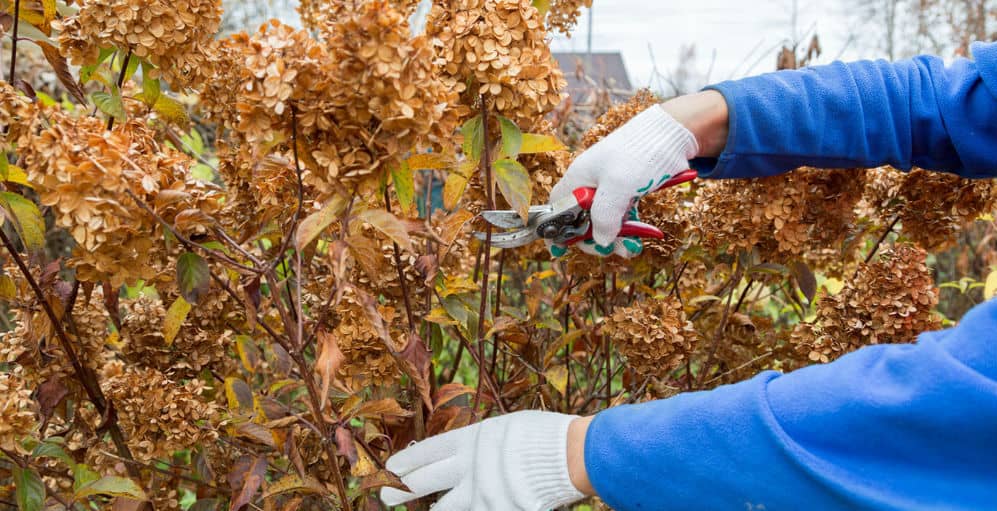
One of the most common causes of a Hydrangea not flowering is because they have been pruned incorrectly and this is because some types flower on new growth produced in spring and some types flower on the previous year’s growth. This means if you prune them hard in late summer or spring, you can potentially cut off all the current year’s flowering stems resulting in next to no flowers the following season.
You can read our detailed guide on when to prune Hydrangeas here.

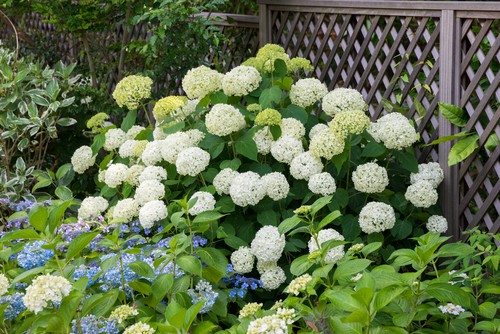
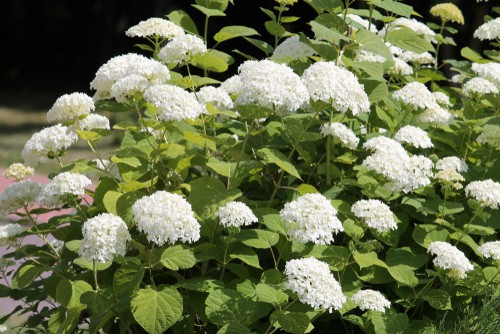
Mophead Hydrangeas (as pictured above) do not require regular pruning. What is best for them, however, is deadheading, where you remove the flowers after they have bloomed simply for aesthetic purposes, so that the plant doesn’t dedicate limited resources to dying flowers and to encourage more flowers. It’s also good to remove any dead branches you see.
However, if your Hydrangea is getting too old or too large you might have to prune it quite hard to rejuvenate it.
Use the following method if you have a mop head, lace cap or Oakleaf Hydrangeas:
Prune only in the summer before the month of August. The reason for this is that these varieties of Hydrangeas bloom on old wood which is effectively the stem from the previous season, not the current season. They start to produce flower buds on the stems in the months of August, September and October for the following summer and if you prune these stems during that time you will remove the buds by accident and you won’t get flowers the following year.
Use the following method if you have a paniculata or a smooth Hydrangea:
These Hydrangeas bloom on new wood every year so the only time that you cannot prune them is in the spring for the smooth Hydrangeas and the summer for the paniculata Hydrangeas as they are getting ready to bloom. Most people use these particular varieties to create hedges and are able to cut them to within a few centimetres of the ground so that they don’t look straggly during the winter. They will come back every year with beautiful blooms and possibly make the most amazing looking hedge you will ever see.
The Hydrangea paniculata can be pruned into the shape of a tree and it’s the only variety that can be pruned into the shape of a tree.
Deadheading your Hydrangea
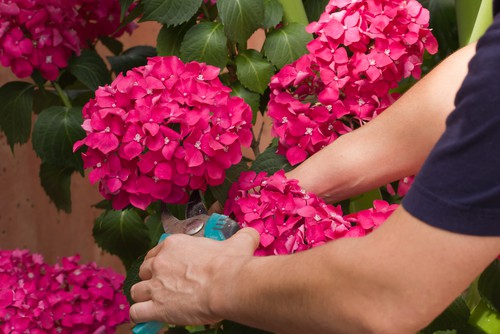
Very similar to pruning, people think deadheading is the same but in reality, it is the process of removing the old blooms after they have reached their peak maturity. You can do this as soon as they reach their largest state and simply cut them off with long stems to create arrangements in your home. Of course, you can always cut them off just to keep your Hydrangea aesthetically pleasing. Alternatively, some people choose to leave the dead blooms on the plant because they provide protection against frost or other cold weather for the new blooms that are growing underneath.
Changing the colour of your Hydrangea
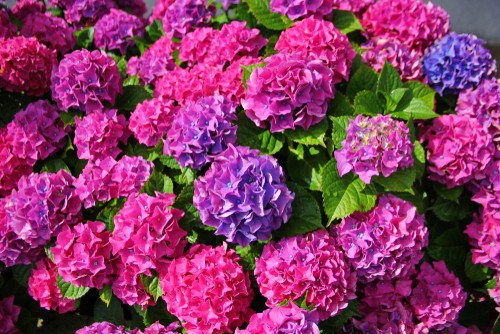
Hydrangeas are exciting plants because you can change the colour of their flowers, however, you can only do this with a few of the varieties. The lace caps or the mop heads are the ones you want if this is a goal you have in mind for your garden and changing the colour comes down to monitoring the pH levels in the soil and altering those.
You should note that this is a process you will have to do regularly. If you change the pH levels for one season and obtain the colour bloom you want, you will need to test and change the soil every single season because your soil will naturally revert back to its original pH levels.
It is important to note that if you purchase your Hydrangeas from a nursery, whatever shade you see is not necessarily the shade you will get in your garden because the plant is reacting to the soil pH levels in the pot from the nursery and those may be different from the soil in your garden.
In order to change to a pink colour, your plants need to stop absorbing aluminium from the soil. If your soil contains aluminium naturally you need to try and reduce that level by raising the pH of your soil. You can add dolomitic lime to your soil several times per year to increase the pH level and you can also use a fertiliser that contains high levels of phosphorus. Phosphorus will prevent the aluminium from creeping into your Hydrangea’s root system.
In order to achieve a blue colour, your plants need to absorb extra aluminium. To do that you can add aluminium sulphate to the soil and keep the pH levels low. The balance needs to be much lower and can be achieved by adding not just aluminium sulphate but organic matter such as coffee grounds or grass clippings. If your soil naturally contains aluminium and is very acidic your Hydrangeas will typically take on a blue or purple shade.
This can be a difficult process and often one that is not successful, we recommend growing them in pots if you have a specific colour you want to grow because it is easier to control the pH of the compost.
You can learn more about how to change the colour of your Hydrangeas here.
How to grow Hydrangea from cuttings
Propagating Hydrangeas is fairly simple.
- First, take a cutting from a branch of your existing Hydrangea shrub that is approximately 12cm in length. It is better to take a cutting from a branch that didn’t flower in the current season.
- Once you have your cutting, remove any of the lower leaves until you have nothing but two sets of leaves at the top.
- Dip the cutting in rooting hormone if you prefer and then place it inside a pot full of half grit and half compost.
- Water it well and allow the water to drain. This will help the soil to remain moist all the way through but not too soggy.
- Once this is done you need to cover the cutting and the pot with plastic but do it in such a fashion that the plastic does not physically touch the leaves. Be sure not to over water because it will cause your cuttings to rot.
When you place the cuttings in containers be advised that there is all manner of containers you can use. You don’t have to purchase specific containers for this purpose because you can use things like plastic cups, old containers that you have sterilised from previous plant purchases and even cleaned out yoghurt cups. You can even take other plastic cups and put them on top, for example, a styrofoam cup. Just remember to drill holes in the pots so that the water can drain away.
Within approximately three or four weeks, depending on the temperature and the humidity, your cuttings will be ready and you can transplant them into a larger pot or into the ground.
Learn more about taking cuttings from climbing Hydrangeas in this guide.
You can also grow Hydrangeas from seed, however, they don’t grow true to seed so you never know quite what you will get – Learn how to grow Hydrangeas from seed in my guide here.
Pest and diseases to look out for
Botrytis blight
This disease takes the form of small, brown blotches on your plant. You might also see your flowers covered in a grey fungus. This disease happens when there are cooler, wet conditions and the spores are transferred from one part of your plant to another by wind. To prevent this you need to remove any dead or affected leaves, try to allow the plant to dry out a bit, perhaps cut away any dead branches and use products to help control the fungus such as potassium bicarbonate.
Powdery mildew
Powdery mildew can take place on any variety but is most common with the big-leaf Hydrangeas. For this, you might see white powdery mildew growth on the leaves or even a yellow and purple shade. This doesn’t necessarily harm the plant but it is problematic for the aesthetics of the plant. If your Hydrangea is grown in a shady area or it’s very crowded (perhaps by another tree) this encourages high humidity that leads to mildew growth. It’s important to clean up fallen leaves and any infected leaves or branches so that the infection and the spores cannot travel. You can buy products like potassium bicarbonate to control it chemically but this isn’t a requirement other than in the most severe of cases.
Leaf spot
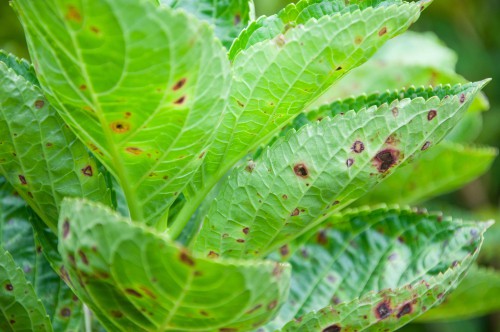
Leaf spot can occur in Hydrangeas and is actually fairly common. You might see tan or brown spots on your leaves and this problem can actually be reduced by simply minimising how wet the leaves get. You can add protectant fungicides if necessary.
Root rot
Root rot is particularly problematic for Oak Leaf Hydrangeas and if your plant has been stressed by drought it is more susceptible. You will likely see symptoms of wilting in your new shoots. Watering does not return the leaves to normal if the plant is suffering from root rot. You will start to see the shoots wilting and dying within several weeks. It is important to avoid planting your Hydrangeas in areas where flooding might take place or where there are insufficient levels of airflow and sunlight.
Aphids
Hydrangeas are at risk to aphids much the same as any other plant. Aphids will feed on the leaves and cause distortion. They excrete a liquid waste that is high in sugar and it’s referred to as honeydew. This coats the leaves and the surfaces and causes subsequent issues. To control an aphid infestation you need to hose them off with a very strong spray or spray with an insecticide as soon as you notice them.
You can make homemade versions of this that contain dish soap and water but the key here is to make sure that every single part of your plant is completely covered with the substance otherwise a single aphid (or two) can survive and damage the plant. This is, of course, easier said than done and very difficult with larger plants, however, it’s usually the younger plants that are most at risk
Learn more about common Hydrangea pest and diseases.
Winter Protection
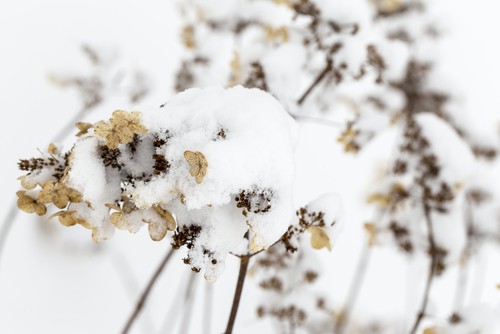
If your plants are outside you can protect them over the winter by putting a frame around the Hydrangea, using materials like sturdy sticks and chicken wire. You can even use burlap (or some other material) that covers the entire plant and still allows air circulation. After that, you want to put an insulating material like pine straw or oak leaves down into the enclosure you create, being careful not to break off any of the branches as you are doing this. Keep it covered and allow air to flow throughout the winter and your plant will be just fine.
We the recent mild winters in the UK this is probably not necessary and its usually younger plants that are most at risk, it’s obviously not practical for larger plants. If you have potted plants, you can use fleece to protect the plant and wrap the pot in some sort of sacking to protect the roots from hard prolonged frost.
What if my Hydrangea won’t bloom?
If you have planted your Hydrangea successfully and it’s not blooming, ask yourself if you have pruned it too drastically. You may have also pruned it during the wrong time of year, or if you accidentally left your Hydrangea outdoors and it has been exposed in the spring to a course of quick frost. Unexpected cold snaps in the early spring can prevent your Hydrangea from blooming.
If your Hydrangea doesn’t flower it is typically the result of accidentally over-pruning, pruning at the wrong time of the year, planting in the wrong area or a late-spring freeze killing off any of the emerging leaves and blooms.
Learn more about Hydrangeas not flowering in this guide.
Uncredited photos: Shutterstock.