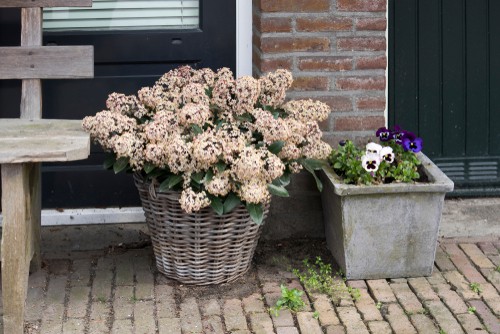
If you are wanting to take a cutting from the Skimmia japonica, you want to take semi-ripe cuttings. By using these cuttings, you can easily propagate new shrubs.
When should you take your Skimmia cuttings?
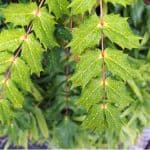
Semi-ripe cuttings need to be taken from the current season’s growth. You want to find pieces so the base of the cutting is hard but the tip is soft. You can typically find stems like this on your shrub between the end of summer and the middle of autumn. Never select damaged, atypical or unhealthy sections. If you are ahead you can encourage your shrub to produce suitable material for these cuttings by hard pruning the unproductive plant in the spring prior to the cuttings in order to stimulate new growth.
Preparing Your Tools Beforehand
When you take a cutting it’s imperative that you have properly sterilised and cleaned tools. The last thing you want is to accidentally transfer a disease from one plant to another simply because you forgot to clean your garden tools.
There are many methods you can use to properly clean these, including a quick mixture of rubbing alcohol or white vinegar and water, even bleach and water. There are commercial products you can use as well, such as Jeyes Fluid or any household cleaning products.
Equally important is to have properly sharpened tools. When you take a cutting you want to make sure that you are able to do so in a clean, fast fashion. If you end up with rough cuts while trying to obtain a cutting, you will leave it susceptible to a great deal of diseases and other problems.

How to Take Cuttings
Step 1
When you are ready, you can use a basic method to take your semi-ripe cuttings. This method requires you to cut just below a leaf to take a cutting, making sure that it’s roughly 10-15cm in length. Once you take your cuttings put them in a plastic bag immediately and keep that bag in your refrigerator or in the shade until you’re ready to put the cutting in a pot. Your goal is to make sure you have the cuttings placed in a container within 12 hours, although it’s always best to take a cutting and plant it straight away if possible.
Step 2
To prepare the cuttings for their pot, you want to trim the cutting just below a leaf node, also removing the lowest leaves as well as the soft tips. You should still have about four leaves remaining once this process is done.
Step 3
Always dip the bottom of the cutting into a rooting hormone powder to make sure that the cut is covered. Including this step will ensure the cutting is well on it’s way to developing roots.
Step 4
Insert your cutting into the appropriately sized container, after you have filled the container with compost. Water it well and allow it to drain fully before you place it in your greenhouse or in a propagator, keeping them away from direct sunlight.
A little tip is to bunch 3 or 4 cuttings together before inserting them into pots because this will help them to form bushier plants as they establish themselves. If any of the cuttings don’t take, you can simply remove them later on.
All of the containers in which you put your cuttings should be covered with a plastic bag or a plastic top (to create a greenhouse effect) and kept out of direct sunlight but still in a location where it can receive a lot of warmth and light.
Aftercare
Once you see that they are developing and you can see roots coming out of the bottom of the pots, they will need hardening off before they are planted outside permanently. Hardening off is a process where for the first 2-3 weeks (before you put them in their final home) you place them outside where they receive exposure to sun and cooler temperatures for a few hours each day in the afternoon.
If you notice diseased or dead cuttings, basically ones that haven’t quite made the cut, figuratively, get rid of them.
Make sure you keep your eyes peeled for fungal mould or root rot because this can damage your cuttings. This is why most people take a handful of cuttings so that in the end some can be propagated to maturity and any that didn’t quite make it can be disposed of.
1 Comment
Hello John,
I’m glad I’ve found you and I hope it’s OK for me to ask a question?
My daughter moved from her old house 15 years ago and on the day she left I took a couple of twigs (with a heel) of the beautiful Skimmia she had in her front garden. It’s done pretty well considering I didn’t have a clue and this spring is a mass of red berries. Lots of people admire it even though it’s fairly small. I’d like to take a few cuttings from it to spread the love, as they say! I know I was lucky once but I’d like to do it properly this time. I’ve just been looking at it but every stem has either ripe or green berries. I’ve Googled how to take the cuttings and I’m sure I could take at least 3 but nowhere does it mention if you can take Berry bearing stems as cuttings. I’m sure I’ve read somewhere about not using flower bearing bits as slips.
I wonder if you’d have a minute to drop me line to give me some advice?
Thank you very much for reading this far! I’ll look forward to hearing from you.
Best regards,
Chris Johnson