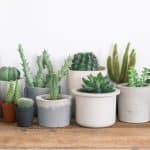
There are over 2,000 species of succulents so if you can’t find the ones you want from your local garden centre or nursery, consider growing from seeds because there are lots of choices online from online sellers and nurseries.
Succulents are diverse, trendy, and with the right amount of care will last a very long time. You can improve any indoor space be at your home or your office by simply adding a few succulents. Even outdoor patios can benefit from the additional succulent here or there. What’s more, if you find one that grows particularly well in your area you can grow it from seed so that you can enjoy it all over your garden.
Tip:
Before you get started, growing from seed means a different germination time depending on the variety. So make sure you don’t remove the variety you are growing from the soil too early. Verify what germination time you have for the variety you have in question and make sure to regularly monitor the temperature and the sunlight that your seeds get during the germination process. Moderate temperatures in the spring, as well as autumn, are the best conditions for growing succulents from seeds.
What you need:
You will need shallow seed trays or a propagator with lid with proper drainage holes at the bottom. You will also need sand like horticultural sand or perlite, both of which are readily available at garden centres and online, seeds (lots of interesting choices online), clear plastic to cover the trays if aren’t using a covered propagator, and a toothpick.
Of course, if you invest in germination trays, these come with the bottom tray as well as the plastic lid that affixes directly to the tray and are actually well worth investing in and relatively inexpensive. It’s a more expensive route but well worth the investment if you plan on germinating for more than just one year.
See our top recommended propagators by clicking here
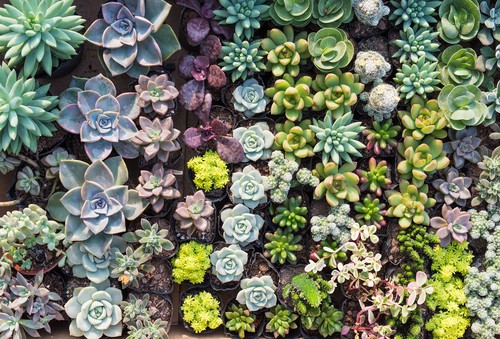
Finding the Seeds
It will take a bit of research to find the seeds that you want. Consider what type of mature succulent you want and then look carefully at the germination time for that variety. You should buy only from a reputable seed seller. Almost all commercial seed companies will have the seeds you want. Some of the easiest varieties to grow include Sedum, Jade and Aloe. Why not go over to Amazon and do a quick search for succulent seeds, the variety available is amazing.
Preparing the succulent seed compost using horticultural grit and potting soil or perlite
Once you have your seeds it’s time to prepare the seed compost – the compost in which the seeds are planted. Some enthusiasts use horticultural sand only, while others mix a small amount of potting soil into the sand or perlite mixture. The amount of seed compost you use is contingent upon the ratio you decide, the size of your trays, and of course how many trays you plan to use while germinating.
If, for example, you are growing a succulent that has decidedly fatter leaves, that means the leaves hold more water so you can add extra perlite into the mixture for better drainage. If you have a succulent with very delicate leaves it will not retain as much water in the leaves, this means a higher ratio of soil into the horticultural sand will benefit the plant by allowing better moisture retention in the soil. For almost all varieties you can get adequate drainage with a half-and-half mixture of sand with potting soil.
Preparing the trays ready for planting the seeds
Pasteurising the soil before planting seeds
Younger succulents are particularly susceptible to disease so make sure you have prepared the soil mixture before you put the seeds in it by pasteurising it. This process requires you to bake or microwave the soil. If you bake it, do so for 30 minutes at around 150°C. If you microwave, do it on high for about 10 minutes. Allow the mixture to cool and once it has cooled thoroughly, wet it and allow it to drain. This process may seem a little over the top but it’s well worth doing just to ensure the best chance of success. You could skip this step and may not have any problems, the choice is yours.
Sterilise trays with bleach or Jeyes Fluid
Whether you are using brand new trays or trays you have used previously you also want to make sure they are sterilised for this process so that no unnecessary germs or residue make their way into your baby succulents. There are plenty of ways to do this, depending on what you have on hand. You can sterilise them with any products you have in your home like bleach, where you can place them in a mixture of 9 parts water to 1 part bleach, etc. You could also use Jeyes Fluid to sterilise trays and this is also readily available.
Once they have been thoroughly washed, fill them with your seed compost within 2cm from the top of the tray.
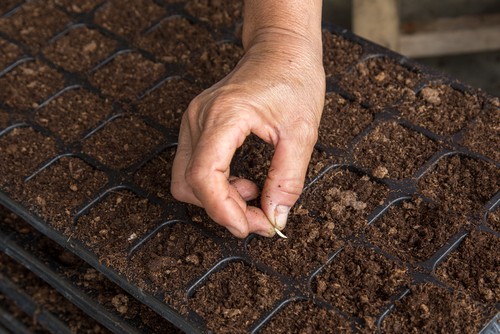
Planting the tiny succulent seeds
The seeds for succulents are incredibly small so make sure you plant your seeds in a protected area so that the wind doesn’t accidentally blow them away. You should dampen the surface of the soil so that the seeds actually stick or again, they might get blown away. Carefully spread the seeds over your soil mixture spacing them appropriately.
Spacing seeds
The amount of space in between each seed is contingent upon the variety you choose, so pay careful attention to what your variety requires. If you sow the seed scattered you can later transplant the seedlings into their own pots which means you don’t need to worry too much about the space between the seeds.
Shallow trays vs small pots
If you are sowing them into small pots instead, which some people do, you will need to keep in mind the total amount of space that the mature plants will need because this will dictate how much space you need to allow while they are still growing. This is where the toothpick comes in handy. Using the toothpick you can easily spread the seeds around.
If you are growing more than one variety at the same time it’s best that you grow them in separate trays, especially if they have separate germination times. This will allow you to better control the amount of sunlight and monitor the water level each variety receives at different stages of development.
After planting seeds, cover with a lid if grown in a propagator or with clear plastic if growing in trays or small pots
When you are done with the seeds, do not cover them with seed compost. However, you should cover the trays with a clear lid or some form of clear plastic wrap.
Where to place the seed trays
Place the seed trays in a well-lit area that does not get direct sunlight. Throughout this process, you should open the lid or remove the clear plastic twice each day to allow air circulation. You might have even poked some ventilation holes with the toothpick if you have it plastic wrap as your cover.
Keep the soil moist but never over water as young succulent seeds are susceptible to drowning.

Monitor their growth
With that done, it can take anywhere between three days and a few weeks for your succulent to start growing depending on the type you are germinating. As soon as you notice leaves emerging from the plants, remove the lid throughout the day so that it stays ventilated.
Keep the soil moist but not wet
For the first week or two, you can continue keeping the soil moist, as this is the time when the roots are starting to develop. But after the first few weeks, the roots have established themselves and you won’t have to work as hard to keep the soil moist. In fact, based on the plant growth and the type of succulent you are growing, eventually, you will only be watering once a week.
Start to give them more direct sinlight
This is also when you begin to introduce your plant to direct sunlight. Being desert plants, succulents do get the reputation for thriving off heat and sunlight. However, baby plants do not like a lot of direct sunlight so don’t introduce them to full sun all at once. So, once the leaves are mature you can slowly introduce them, increasing the amount of light they receive by about an hour every few days until such time that they are tolerant of a well-lit area permanently.
Again it’s important to know which one, out of the 2000 available varieties, you are growing so that you can be sure how much sun they actually need.
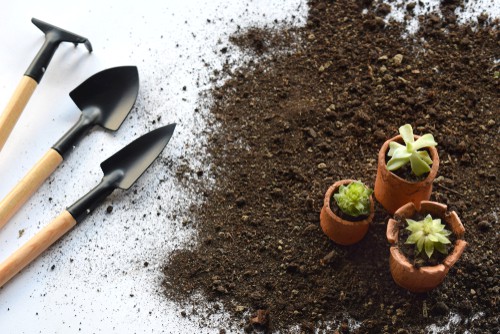
Transplanting succulent seedlings
Don’t rush the process of transplanting. You’re going to be with this succulent for a long time so you can leave the young succulent until it’s mature enough that it won’t get damaged by the move. In fact, you can wait up to six months or so before you replant your succulent into a new container, it’s a permanent home.
When it is time to transplant, rest assured that the root balls are fairly tight so all you need to do is gently shake the soil around the base and lift it out. You won’t have to tug much on the roots because the plant will come loose quite easily. You can use your fingers to remove any old soil and get rid of any dead roots that you see hanging off the plant.  Compost ideal for repotting succulents – Available from Amazon.co.uk
The new pot needs to be slightly larger than the old one (if you grew them in small pots to start with) so that your succulent has an opportunity to grow. If you grew them in seeds trays as we recommend you can just use tiny 3-inch pots or something similar. You can help with drainage by adding loose gravel to the bottom of the container.
Use new compost that is appropriate for the type of succulent you have, most will grow well in general succulent compost that you can buy from local garden centres or online. Fill the pot half way, place your succulent inside, and add enough soil mixture to cover the remaining roots. Press down gently around the base of your succulent to remove any air pockets and fill in all the remaining areas with soil.
After a few days, water. Unlike most transplanted plants, you don’t want to water immediately because you want to succulents have some time to adjust to its new compost and environment.
General care of newly potted succulents
With this transplantation out of the way, caring for your succulent becomes quite easy. Generally speaking, succulents don’t need much maintenance once they reach this level although you should be mindful of the amount of light they get. They need access to regular light but not necessarily direct sunlight.
Rotate the pots regularly
You want to rotate your succulent container regularly so that all parts of the plant get some light. You will know if it’s time to rotate because the leaves will start to tilt toward the sun.
Watering
It’s important to know what the temperature is where you are leaving your succulent so that you can appropriately determine how quickly the water will evaporate, something that will help you gauge when it’s time to water.
This is important because overwatering can be problematic for a succulent. Believe it or not, succulents need more water in the spring and summer the same as any other plant. The soil should be allowed to dry out in between each watering approximately 3cm below the surface of the soil.
Always water the soil directly and wait until you see it come out the drainage holes. On average most succulents only need to be watered once per week, however, this can vary slightly depending on your climate and the variety you are growing.
Dealing with dust and bugs
If you have an indoor plant you can wipe it off periodically to get rid of any dirt or dust. If you notice any bug problems you can reduce the amount of watering or integrate a mixture that is 70% rubbing alcohol and spray the soil. One quick and easy way to thoroughly water is to place the succulent in the shower, turn on the water, which will not only rinse off the leaves but allow the water to thoroughly penetrate and come out the drainage holes. Once everything is dry, put it back in its normal place.
Overall the long term care of succulents is quite simple. And once you have cultivated succulents to maturity you can always use the seeds to germinate additional plants.
Learn how to overwinter succulents in our beginner’s guide by clicking here
Image credits – Shutterstock.com