
So planting bulbs in the autumn is a great way to prepare your garden so that you get a stunning show of colour in the spring, after all, daffodils, tulips as well as many other first bulbs are often the first signs that spring has sprung.
It’s an exciting time as we know the gardening season has started again with lots to look forward to. The problem I’m often faced with, and as a professional gardener, is something I am often put off doing is having to plant hundreds if not thousands of bulbs.
That was until I got myself a good quality bulb auger, it was a real game-changer, one of the best gardening tools I now own, it’s amazing. The time saved alone is well worth the price even though they are not that expensive. Best of all, it made planting bulbs more enjoyable, much easier, less backbreaking, easier on the wrist/hands and did I mention much easier than using a bulb planter or trowel?!
So in this guide, I’m going to talk about what a bulb auger is, how a bulb auger works and how to use a bulb auger with some tips.
What is a bulb auger?

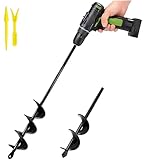
A bulb auger is simply a large drill bit that you insert into a drill that removes channels of soil from the ground for the purpose of planting bulbs. You can also use them for planting bedding plants and even larger shrubs if you have a big enough auger. You can even use them for aerating compost heaps although a specialist compost aerator, such as the ones I have reviewed here are better suited for this.
How a bulb auger works
As I have previously mentioned, a bulb auger is just a large drill bit that you attach to a drill. As you drive the auger into the ground that is being turned by the drill, the auger drives the soil upwards and creates a perfectly shaped hole. It literally takes seconds to drill a perfectly shaped hole, even in compact soil. You can even use an auger to drill larger holes by drilling several small holes together.
How to use a bulb auger
Using a bulb auger takes a little practice to get used to, be warned, you don’t just push them into the ground at full speed, this will end in injury as the auger can stop suddenly, with the drill continuing to spin. I’m not kidding, this next part you need to read.
It is all about the drill settings and the technique you use when drilling the holes. First of all, you need to insert your bulb auger into the drill just like a regular drill bit and make sure it’s nice and tight as well as straight. I use a cordless drill but you can use a corded drill as well.
Selecting the correct setting on the drill
This bit is incredibly important, set the speed to the lowest setting, most drills have 2 or 3 speed settings, set the speed to the lowest setting which will be 1.
Set the drill to ‘drill’ and NOT ‘hammer’ and make sure it is in forwards.
Now set the torque using the clutch setting to a low setting, maybe halfway, you could even set it to the lowest setting and work your way up. On my drill, I usually use it on 10 torque but it depends on your drill.
What this does, depending on how much resistance the auger hits, the drill will stop at a certain point. The higher the torque the more power it has to dig through soil that is more compact, but you don’t want to overwork the drill.
One last point, if your drill comes with a second handle, I highly recommend you attach it to the drill. You will have a lot more control of the drill when using the auger.
How to use the auger to make holes
So this is where using the right technique comes in. So first things first, you don’t want to push down on the drill straight into the soil. This will drive the auger into the soil and not remove the soil so the auger will get stuck. If this happens, no problem, just put the drill in reverse to free the auger.

You want to let the weight of the drill do the digging and your job is just to move the auger up and down slowly, this will clear the hole as you drill.
If you get resistance and the drill stops easily, this is where you also need to increase the torque on the drill until you find a good balance. If you still get resistance and the drill keeps stopping, just push the drill down slightly and lift it up again to clear the hole. Most of the time, this will work and bring up small stones with the soil.
If this still doesn’t work, you may have hit a large stone and in this case, just drill a new hole next to it, try again and it’s usually fine. From experience, I have found that even in very compact soil next to tree roots, I can usually drill a hole with an auger and experience no real problem. This is when I compare it back to every autumn when I would struggle with a traditional trowel or bulb planter, it was very difficult (especially around the roots of established shrubs), using an auger has made it much easier. It’s all about the up and down motion and clearing the holes as you drill.
My bulb planting process
I like to create all my planting holes at the same time with the auger. You can see below I’ve made a lot of planting holes for a display of daffodils I’m planting.
Once I have all my holes made, I plant all my bulbs where I have planned ahead of time roughly where I would like certain plants to be, with the taller growing bulbs at the back, smaller ones towards the front. How to plan how you organise your display is totally up to you.
Then lightly rake the soil over the holes so that it fills the holes back in with soil.
The soil that is brought to the surface with the auger is usually nice fine soil so it’s easy to rake it over again and back into the holes. I also tamp the soil with the back of the rake and then lightly rake again.
Thats it, all your bulbs will be planted in a fraction of the time that it takes when using a traditional trowel or a bulb planter.
Where to buy a bulb auger
I have been to many garden centres and nurseries and never really seen them for sale but you can get them online easily. There are many different sizes on Amazon and this is actually where I purchased mine from. For daffodils, tulips and smaller bulbs, I find that the 1.6in/4cm diameter versions are best. If you have larger bulbs, such as large daffodils and hyacinths you will need a larger diameter bulb auger, maybe 6.6 inch diameter model.
You can learn more about growing daffodils here, growing tulips here and read my general guide on how to plants bulbs here. (All links open in a new window so you can carry on reading this guide)
Bulb augers are usually available either 16.5in/22cm long (which I prefer) so I experience less bending over or the 9in/22cm length versions are better if you prefer to work on your hands and knees.
The best bulb augers
I will link to the ones I recently purchased below:


If you still want to take the traditional route then I would consider a long-handled bulb planter that I have also reviewed in this post (open in new window)
If you’re looking for a petrol auger for planting posts, check out this article here
Last update on 2026-05-30 / Affiliate links / Images from Amazon Product Advertising API
