Buying new plants regularly can be very expensive and while it seems intimidating at first, you can avoid some of that expense by propagating from a Jasmine plant you have already successfully grown.
Propagating hardy Jasmine can be done with two techniques: layering or the use of cuttings. The most successful and simple way is through hardwood cuttings. Hardwood cuttings are best taken with hardy outdoor varieties of Jasmine between late autumn and winter, with the ideal time being just after the leaves have dropped in the autumn or just before the buds burst in late winter.
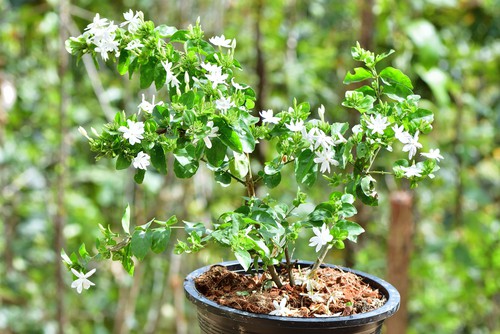
More tender varieties grown in greenhouses or indoor varieties should be done using softwood or semi-ripe cuttings, which are taken in the spring or summer.
How to propagate Jasmine
When to propagate Jasmine
As already mentioned, outdoor varieties of Jasmine are best propagated when you take a hardwood cutting in the winter, ideally just after the leaves have dropped. If you have a glasshouse variety or something more tender it is best to take a semi-ripe cutting in the spring or summer.
Taking hardwood cuttings from hardy varieties
Growing cuttings in pots
Hardwood cuttings are a very reliable way to propagate Jasminium. We recommend growing hardwood cuttings in containers initially and then moving them to a prepared area outside (or in a larger container) once they have established a good root system which is usually the following season, after at least 12 months.
Growing cuttings outdoors
You can plant cuttings outdoors in a sheltered area instead of in pots by digging a trench and putting sand at the bottom and mixing in some garden compost or organic material.
How to take the cutting
Step 1
When you set about taking your hardwood cuttings from an outdoor Jasmine plant, look for healthy shoots that have been grown in the current year. Remove just the soft tip growth and cut this into sections that are approximately 15-30cm in length. When you cut, you should make a clean cut just above a bud at the top of your plant and do so at a 45-degree angle so that water falls off the end without any issue.
Step 2
After that, cut straight across at the base, right below either a bud or a pair of buds. Take the lower end of your cutting and dip it into a hormone rooting powder. This powder is important for two reasons. Firstly, it helps to promote root formation and secondly, it has a strong fungicide that helps to protect against rot.
Step 3
Prepare the containers in which your hardwood cuttings will be grown and fill them with seed and cutting compost, you can also mix in some grit to improve drainage. Insert your cuttings directly into the pot so that two-thirds of the cuttings are below the surface. The roots will form along this stem underground and only one third should be above ground, from which the buds will shoot.
Planting cuttings outdoors in a trench
If you plant your cuttings in a trench or in the ground then the same process is followed, just backfill the trench with compost or other organic material mixed with the garden soil.
Step 4 – Optional
This next step is optional because not everyone covers their cuttings, however, some gardeners prefer to, we personally think it does give slightly better results and prevents them from drying out as easily.
When growing your hardwood cuttings in a container, you can choose to cover the containers with something like a plastic cover, a plastic bag, or another plastic cup. You can purchase propagators that have all of these components specially designed for this purpose if you plan on propagating regularly.
If it’s your first time or you’re not sure whether you’re going to stick with it, you can make the most out of whatever materials you have around your home. Just make sure that whatever cover you place and secure over the top of your container does not touch the cutting directly. The point here is to create a miniature greenhouse that keeps everything moist and offers a little protection, with proper exposure to sunlight and just enough moisture that the roots are able to establish themselves. Now the downside here is you need to take the cover off every few days to let the cuttings air and to stop the cuttings from rotting. This is why you may be better off not covering them because they take so long to root naturally, but you do need to make sure you don’t let them dry out.
Step 5
Keep the containers in a sheltered area, away from direct sunlight but with exposure to dappled light. Make sure they don’t dry out but avoid drenching them too often. Within a few months to 12 months, but usually the following autumn, you will have strong enough root systems. By this time, they should have good top growth and roots that are coming out of the bottom of the pot and once they’re established, you can move them to a larger container or transplant them outside as you see fit the following autumn.