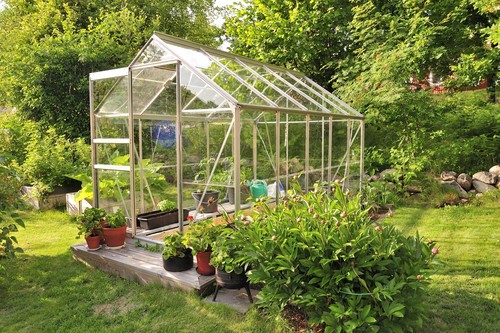
Greenhouses are a wonderful way to help plants thrive all year round, to overwinter plants that cannot remain outside, to propagate ahead of spring, and much more. One of the must-do jobs, especially if you intend to keep your greenhouse frost free or use a greenhouse heater over the winter, is to line the greenhouse with bubble wrap because this is the best way to insulate a greenhouse. Best of all, it’s a very easy process with the right clips and materials.
Why should you insulate your greenhouse?
If you have a greenhouse it’s important to properly insulate it so that the heat gets in and the light is allowed through. One of the best ways to insulate a greenhouse is to add a layer of bubble wrap because it does both of these jobs in a very cost-effective way.
How to insulate the greenhouse using bubble wrap
By adding a layer of bubble wrap in the winter you can give your plants extra protection because it keeps the heat inside the greenhouse for longer and allows the light to filter through. Insulation using bubble wrap prevents draughts and will go a long way towards reducing your energy bills if you are using some form of heater during the coldest of winters.
You can see some of our recommended greenhouse heaters in this guide here.
Insulating bubble wrap can be purchased in one-metre increments at a time from garden centres and nurseries, and even from online retailers such as Amazon.co.uk. So take the measurements of your greenhouse so that you know the exact size of the walls, ceilings, doors, and any other components you need to cover so that you are able to purchase the correct amount. It’s important you select polythene bubble wrap because this is designed specifically for greenhouse use. It will last on average 3 years before you will need to replace it and it is UV stabilised.
Buy bubble wrap from Amazon.co.uk here (link opens in new window)
How to fasten bubble wrap to a greenhouse

When you are ready to insulate your greenhouse you will need bubble wrap, scissors, a measuring tape, and either small nails or drawing pins if you have a wooden greenhouse. Most greenhouses, especially metal greenhouses, have ridges in the frame where you can insert plastic clips with washers through the bubble wrap, into the frame and twist. This is the easiest way to secure bubble wrap to your greenhouse as shown below
 Click on the picture to see greenhouse clips on Amazon.co.uk
Step 1
As mentioned, the first thing you will want to do is measure the sides, ends and roof of your greenhouse so that you purchase the correct amount of bubble wrap. Some garden centres if you know the size of the greenhouse will be able to tell you how much bubble wrap you need, however, it’s still best to double-check.
Step 2
Start with the sides of your greenhouse. Place the bubble wrap across the sides, fixing it to the frame of your greenhouse with the nails, drawing pins, or greenhouse clips if you can use them. You want to be sure that it is pulled tightly in place when you affix it along the frame.
Step 3
As you move to the roof, attach the bubble wrap to the ridge of the centre part of your greenhouse and then spread it down the bars until it meets with the side panels. Again use whatever material you have chosen to attach it to each of these points along the frame of the greenhouse.
Step 4
When you hit any windows or vents, cut and fasten the bubble wrap around them so that you can still open them. With that everything should be secured and complete. The process is to be repeated again until all of your greenhouse is covered, and it should be approximately three years before needing to be replaced.