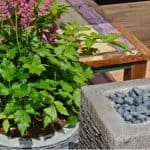
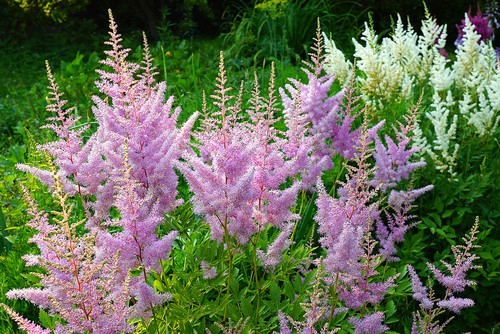
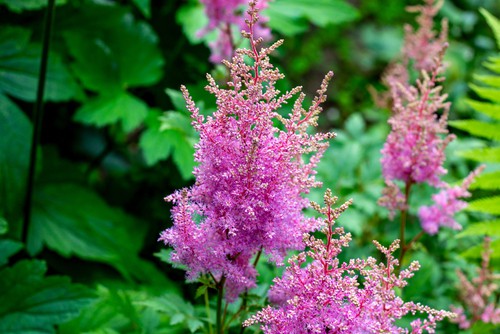
Astilbe plants offer a range of stunning colours and can turn an otherwise boring back garden into something surrounded by plumes of brightly coloured flowers and lace-like foliage. Best of all they also grow in moist soil in a shady position where not much else will thrive.
These plants vary in size and colour so there are some varieties that are shorter, about 20-30cm and others that are perfect for adding a vertical back drop to your garden as they can reach up to a very impressive metre high, or taller. It’s always important for you to know what variety you are buying and that you propagate from a plant with which you are already familiar so that you can anticipate a similar height from the new propagated plant.
Obviously, the colours of flowers range on a given plant and this has a lot to do with the variety of your plant but the foliage can range and colour as well. This depends partially on the soil you have and partially on the available nutrients in your soil. That being said, you can always propagate Astilbes by division and plant the divided offcuts in other areas of your garden just to see how the soil affects the colours.
How to propagate Astilbes
You can successfully propagate by division, which is the best way and this can be done in either autumn or our preferred time, the beginning of spring.
Dividing in the autumn
If you are dividing your Astilbes in the autumn, you want to temporarily replant each of your divisions and store them in pots over winter and then plant them in the spring in your chosen area. It’s worth noting you should wait to divide the rhizomes until the plants have finished flowering.
Dividing in the spring
If you choose to divide your plants in the spring, which we highly recommend, you want to do this early on when the plants are still in their dormancy so that they have the entire season to get themselves established and put their roots out before winter comes back around.
Positioning new plants
Before you plant your divisions make sure you know where the sun and shade fall during the spring and summer because light patterns change throughout the season and these plants are best grown in areas with partial shade during the spring and summer.
If you are propagating from an existing plant you likely have some idea of where the sun and shade patterns happen in your garden so you’ll be able to find the perfect spot for the new baby plants, don’t forget they also love moist soil and will suffer if planted in an area where the soil often dries out.
How to divide an Astilbe
- Start by watering the area around your existing plant, allowing the water to settle for a while before you dive in. This will help to loosen the soil before you get started and make sure the root system is hydrated.
- As that is happening, dig the holes where your new transplants will live, if you are transplanting them immediately. The holes need to be about 20cm deep and between 30cm and 50cm apart. If you have poor soil in that area, dig the hole a little bit deeper and mix in some compost before you start planting.
- Remove any foliage that should have died back from the top of the parent plant before you get started.
- Measure out a diameter of around 20cm to 30cm around your parent plant, mark it or make a mental note.
- Using a spade, gently dig around the plants in the shape of a large bowl to try and keep as much soil intact so that you don’t damage the root structure when you are removing it from the ground.
- Once it is out of the ground you then want to shake away the soil from around the roots. You want to identify what is called the “eyes” on the rhizomes and pinch off sections of root that have an average of four eyes visible. These eyes will contain smaller shoots, much like that potato that you left in the back of the cupboard that has started to sprout. From a single established Astilbe, you should be able to get between four and five divisions.
- Place the new Astilbe divisions into the holes and cover them with soil. You want the top of the transplant where the eyes are merging to face upwards and once it’s covered in the soil it should be about 3cm below the surface.
- Water all of your transplants and if you transplanted at the beginning of spring, add some fertiliser to the mix.
- If you want, you can add mulch in a circular pattern around the base to create a weed barrier, but don’t make it too thick because the new transplants still need extra room to grow.
Top Tips:
If you are taking your divisions in the autumn and you want to store them rather than replant them immediately (which we recommend) you can place each of your divisions into a well-draining potting soil mixture inside of a container and then place all of those containers in a dark cool area, like your garage or a shed.
During the winter you want to avoid watering the pots frequently, but at the same time, you don’t want them to get so dry that the roots shrivel up. In the winter you can add approximately one cup of water every two or three weeks.
Caring for Divisions
Remember, once you transplant your divisions they are not likely to flower during the first growing season because they are focusing on breaking in the new space and fully developing. But starting the second season is when you can expect blooms.
Once they are in place it’s important that you keep them happy by giving them well-draining, rich soil and watering them regularly. You can also give them an annual fertiliser high in potassium and phosphorus to keep their blooms healthy and happy.